9.7.4 Leash CodeHS Answers: Ball, Line and Mouse Explained Step by Step

If you are stuck on 9.7.4 Leash in CodeHS, you are not alone. The task looks simple: make a ball follow your mouse while a line stays tied to it like a leash. Then you run the program, the ball sits still, or the line points the wrong way, or nothing appears at all, and you start to wonder what you missed.
In short, these are the 9.7.4 leash codehs answers: a yellow ball that follows your mouse, a line tied to the centre of the canvas, and a few lines of JavaScript that connect them.
What Is 9.7.4 Leash in CodeHS?
CodeHS is an online platform for learning to code, used by many schools to teach computer science to beginners. Students start with Karel the Dog, a friendly character based on Karel the Robot, a teaching tool created in 1981 by Rich Pattis at Stanford University. Karel teaches the basics, such as commands, loops and conditions, in a simple world where a dog moves around and picks up tennis balls. Later lessons move on to JavaScript graphics, where students draw shapes on a canvas and build small interactive programs.
Lesson 9.7 is about drawing lines. By this point you have already met circles and rectangles, and you have learned to place them on the canvas using coordinates. A line works a little differently from a circle, because it needs two points instead of one position: a starting point and an ending point, and both of them can move. That idea is the heart of the Leash exercise.
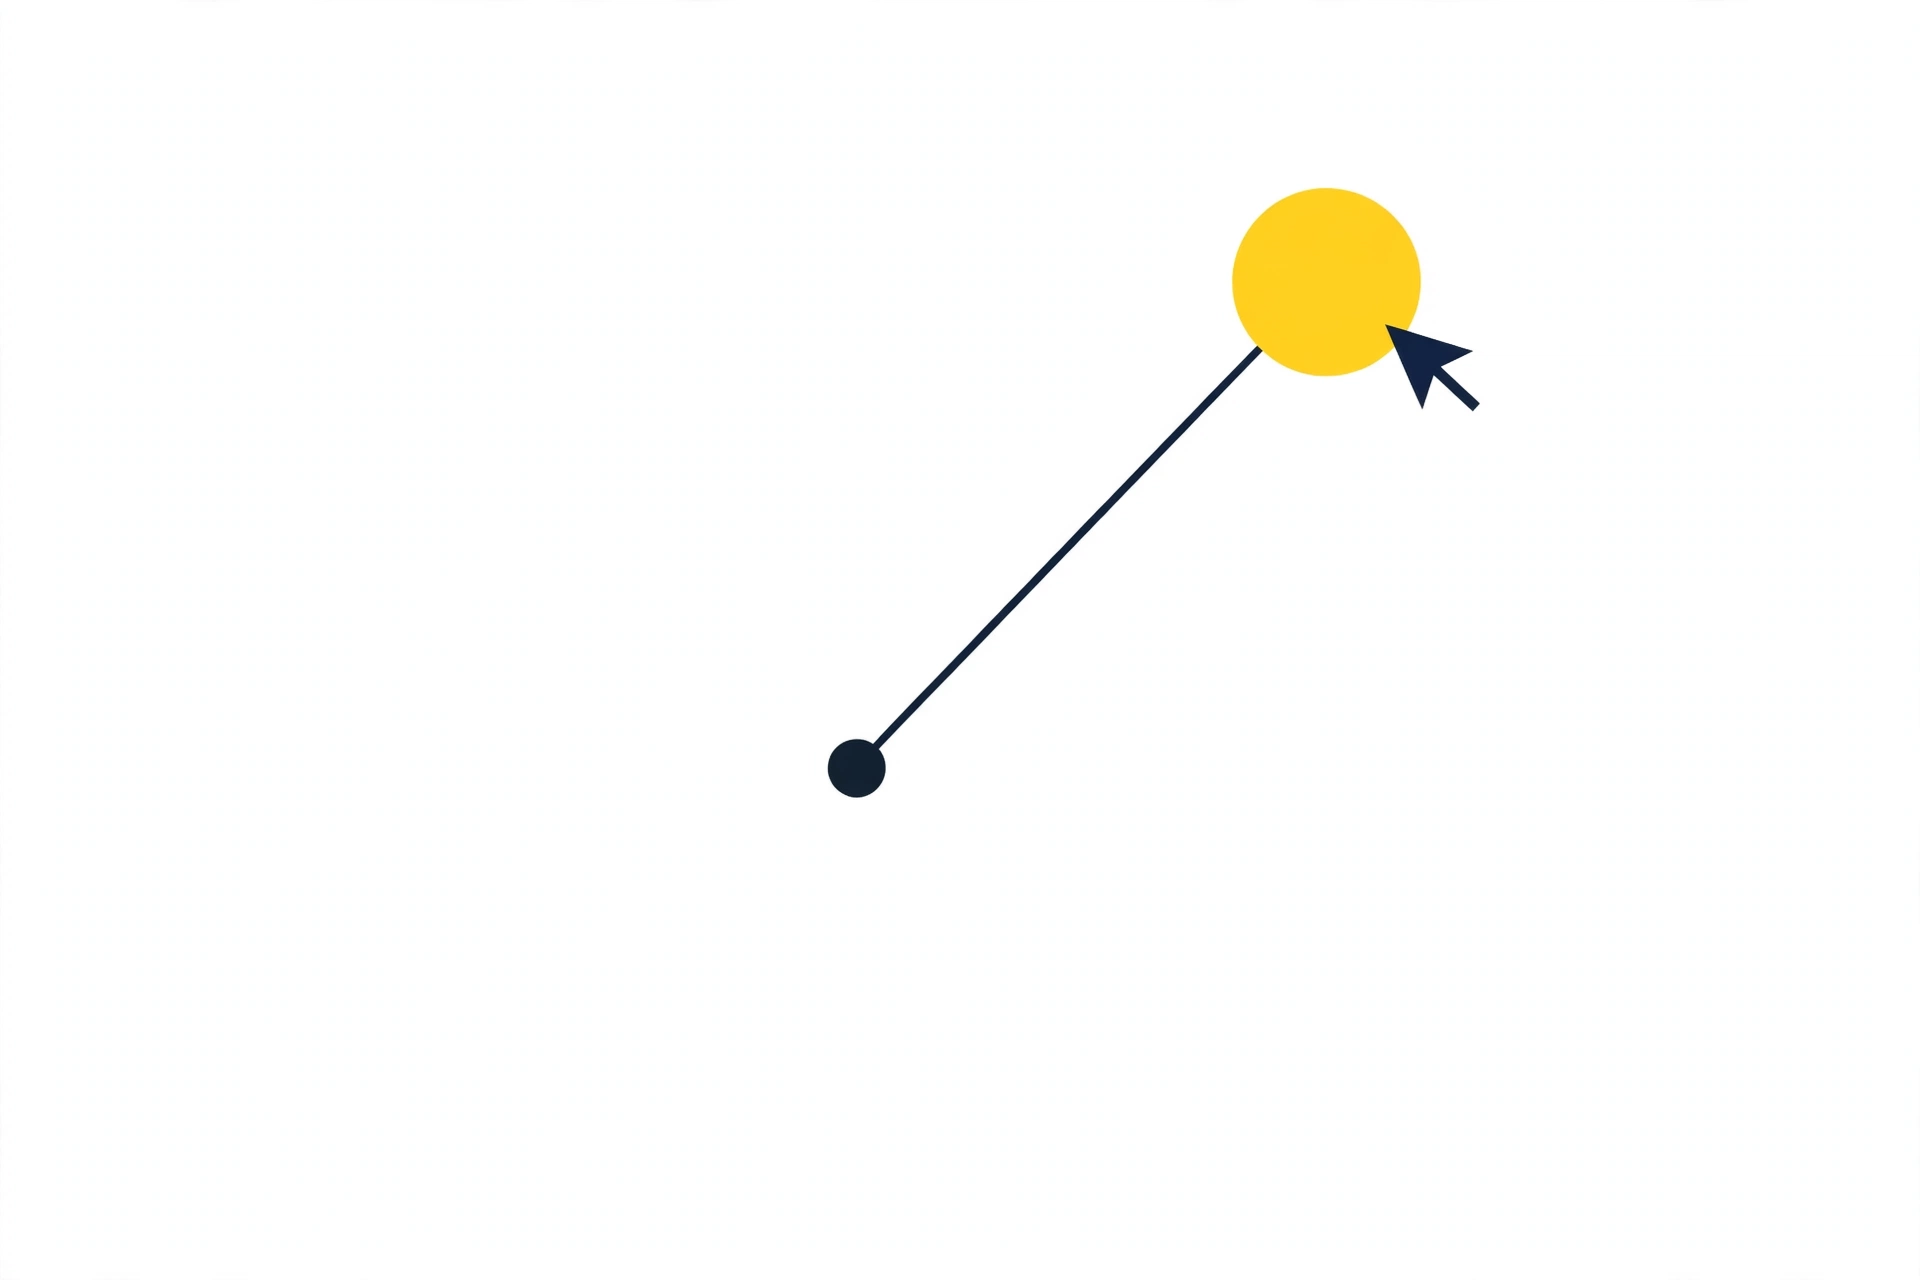
In 9.7.4 Leash, you build a small interactive scene. A ball starts in the middle of the canvas. A line runs from the middle of the canvas to the ball, like a leash on a dog. When you move your mouse, the ball follows the mouse, and the line stretches so that one end stays fixed in the centre and the other end stays attached to the ball. The task teaches several ideas at once: creating graphics objects, placing them in the right order, storing them in variables so you can change them later, and responding to mouse movement. Each idea is small on its own. Put together, they make a program that feels alive, because it reacts to you in real time. The code is short, so every line has to be exactly right. A missing method call, a wrong variable name, or two lines in the wrong order can break the whole thing. Once you see the pattern, though, it clicks into place, and you will recognise it in many later exercises.
What You Will Build
When your program works, here is what you should see. First, a yellow ball sits in the exact centre of the canvas when the program starts. It is a circle with a radius of 30 pixels, large enough to see clearly without taking over the screen. Second, a thin line runs from the centre of the canvas to the ball. At the start, because the ball is sitting in the centre, the line has no length to speak of. It starts and ends at the same point, so you may barely see it. That is normal, and it is not a bug.
As soon as you move your mouse, the scene comes to life. The ball jumps to the mouse position and follows it as you move. The line stretches out from the centre to the ball, keeping one end fixed in the middle while the other end moves with the ball. Move the mouse to the top left corner, and the line points to the top left. Move it in a circle, and the line sweeps around like the hand of a clock, always tied to the centre. There is no button to press and no score to earn. The program simply runs, listens for your mouse, and updates the screen every time the mouse moves.
It helps to picture the canvas as a grid before you write any code. The top left corner is position (0, 0). Moving right increases the x value. Moving down increases the y value, which feels backwards if you are used to maths graphs, but it is how computer screens work. The centre of the canvas is at half the width and half the height. If the canvas is 400 pixels wide and 400 pixels tall, the centre is at (200, 200). Your program works out that centre for itself, so it still works if the canvas size changes. Here are the pieces you will build:
- A ball, made with a Circle object, with a radius of 30, coloured yellow, starting in the centre.
- A leash, made with a Line object, with one end fixed at the centre and the other end attached to the ball.
- A start function that sets everything up when the program first runs.
- A mouse move function that runs every time the mouse moves, and updates both the ball and the line.
- Two variables that remember the ball and the line, so the mouse function can find them and change them later.
How the Exercise Works in Plain Language
Before we look at the code, picture the program in ordinary words. First, you measure the stage so you know where the middle is. Then you place a ball in the middle. Then you tie one end of a string to the middle of the stage and the other end to the ball. Finally, you tell a helper to watch your hand, and every time your hand moves, the helper picks up the ball, puts it where your hand is, and pulls the string along with it. That is exactly what this program does.
Two details matter. First, the program measures the canvas instead of assuming a size, dividing the width and the height by two to find the centre. Second, the line is added to the canvas before the ball, so the ball is drawn on top of the end of the line, like a string tied to a ball. If you reverse that order, the line is drawn over the ball and looks wrong. The mouse part works through a registered function: you tell the system to call your function every time the mouse moves, and the system passes it an event object that says where the mouse is right now. Your function reads that position and moves the ball and the line to match it. The ball and the line are stored in global variables declared at the top of the program, so both functions can reach them.
The Full Solution Code
Here is the complete working solution. Read it through once from top to bottom so you can see the shape of the whole program, then read the line by line explanation in the next section.
var BALL_RADIUS = 30;
var ball;
var leashLine;

function start() {
    var centreX = getWidth() / 2;
    var centreY = getHeight() / 2;

    leashLine = new Line(centreX, centreY, centreX, centreY);
    add(leashLine);

    ball = new Circle(BALL_RADIUS);
    ball.setPosition(centreX, centreY);
    ball.setColor(Color.yellow);
    add(ball);

    mouseMoveMethod(moveLeash);
}

function moveLeash(e) {
    ball.setPosition(e.getX(), e.getY());
    leashLine.setEndpoint(e.getX(), e.getY());
}
That is the whole program, about twenty lines counting blank lines. If you paste it into CodeHS and run it, the ball should start in the centre and follow your mouse, with the line tied to the centre. If it does not, the errors section near the end covers the usual reasons. A note on spelling: this guide uses “centre” in the explanations, but the code uses the variable names centreX and centreY. You can spell them however you like as long as you spell them the same way every time. JavaScript does not care whether you write centre or center, but it does care that you are consistent. Your own course may use a different colour, size or variable name, and that is fine. The structure stays the same in every version. If your assignment asks for a specific colour or size, follow your assignment, and check the code against your own instructions before you submit it.
Line by Line Explanation of the Code
This section goes through the program one piece at a time. The code is short enough to copy in a minute, but the understanding takes a little longer, and it is what will help you on the next exercise, when there is no ready made answer waiting for you.
The Variables at the Top
The first line is var BALL_RADIUS = 30;. It creates a fixed value for the size of the ball. The capital letters and underscore are a common convention for values that stay fixed while the program runs. A radius of 30 means the ball is 60 pixels across: big enough to see, small enough to move freely. Using a named value instead of writing 30 inside the Circle creation has a real benefit. If you later want a bigger or smaller ball, you change one number at the top, and every place that uses the radius picks up the new value.
The next two lines, var ball; and var leashLine;, declare two global variables without giving them a value yet. They are empty boxes, waiting to be filled. They sit outside any function, so every function in the program can see them. The start function will fill them by creating the ball and the line, and the moveLeash function will use them later to move those objects. If they were declared inside start, they would only exist inside start, and moveLeash could not reach them. A variable declared inside a function belongs to that function. A variable declared outside all functions belongs to the whole program.
The start() Function
In CodeHS graphics programs, start is a special function that runs automatically when the program begins. You do not call it yourself. The system calls it once, right at the start. Everything that needs to happen before the user interacts with the program goes inside it: working out the centre, creating the line, creating the ball, and registering the mouse method. The first two lines inside start are var centreX = getWidth() / 2; and var centreY = getHeight() / 2;. GetWidth asks the canvas how wide it is, getHeight asks how tall it is, and dividing each answer by two gives the exact centre. These two variables are local to start, which is fine, because they are only needed while the objects are being created.
Creating the Leash Line
The next two lines create the line and add it to the canvas. leashLine = new Line(centreX, centreY, centreX, centreY); creates a Line object with four numbers: the x and y of its start point, and the x and y of its end point. All four come from the centre, so the line starts with zero length and is nearly invisible. That is right for the starting position, because the ball is also in the centre, so there is no distance for the line to cover yet. The variable leashLine, declared empty at the top, now holds that object, so any function can find it and change it later.
Then add(leashLine); puts the line on the canvas. Creating an object is not the same as showing it. Until you call add, the object exists in memory but is not on the screen. Forgetting this step gives you a program that runs without errors but shows nothing. The order matters too: the line is added before the ball, so the ball is drawn on top of the end of the line, like a string tied to a ball. Reverse the order, and the line is drawn over the ball and looks wrong.
Creating the Ball
Next, ball = new Circle(BALL_RADIUS); creates a circle with a radius of 30. ball.setPosition(centreX, centreY); places it in the centre of the canvas, where the exercise says it should start. ball.setColor(Color.yellow); makes it yellow and easy to see. Then add(ball); puts it on the canvas, on top of the line. The setup is nearly complete. Only one thing is left, and it is what makes the program interactive.
Registering the Mouse Method
The last line inside start is mouseMoveMethod(moveLeash);. It tells the CodeHS system to call a function called moveLeash whenever the mouse moves over the canvas. The name inside the brackets is not a string in quotes, and it is not a call with brackets of its own. It is the name of the function, passed as a reference, so the system knows which function to call later. You are not calling moveLeash here. You are telling the system how to call it later, every time the mouse moves. Once this line has run, start ends, and the program waits for the mouse.
The moveLeash(e) Function and the Event Object
The final function does the most important work. The letter e holds the event object, a small bundle of information about the mouse movement that just happened. The system creates it for you every time the mouse moves and passes it to your function. You only need two pieces from it: the x coordinate of the mouse, and the y coordinate. The first line, ball.setPosition(e.getX(), e.getY());, moves the ball to the current mouse position. Every time the mouse moves, even by one pixel, this line runs again, and the ball moves again. That is why the ball appears to follow the mouse smoothly: it is picked up and put down again, many times a second, at each new mouse position.
The second line, leashLine.setEndpoint(e.getX(), e.getY());, moves the end of the leash to the same mouse position. A Line has a starting point and an ending point, and setEndpoint changes the ending point. The starting point is never changed, so it stays fixed in the centre. Both lines use the same two numbers, and that is the whole trick: the ball and the end of the line are always in the same place, because both are tied to the same mouse position. There is no loop in this function. The system handles the repetition. Your function runs once per mouse movement, does two small updates, and finishes. This pattern, registering a function and letting the system call it when something happens, is called event driven programming, and it is one of the most important ideas in the course.
Why Each Line Matters
Some lines carry more weight than others. If BALL_RADIUS were missing, the Circle would have no size. If the ball and leashLine declarations were missing, the mouse function could not find the objects later. If the centre calculation were missing, the ball would start in the wrong place. If the line were added after the ball, it would be drawn over the ball. If the mouse method were never registered, nothing would happen when you moved the mouse. If moveLeash moved the ball but never updated the line, the line would stay as a dot in the centre. If it used setPosition on the line instead of setEndpoint, the program would fail, because each method belongs to the kind of object it was made for.
| Part of the program | What it does | What goes wrong without it |
|---|---|---|
| BALL_RADIUS = 30 | Sets the ball size in one place | The Circle has no size, or the size is scattered through the code |
| var ball and var leashLine | Store the objects so every function can reach them | The mouse function cannot find the ball or the line |
| centreX and centreY | Work out the middle of the canvas | The ball starts in the wrong place on a different canvas size |
| new Line with centre points | Creates the leash with no length at the start | There is no line to stretch when the mouse moves |
| add(leashLine) before add(ball) | Puts the line under the ball | The line is drawn over the ball and looks wrong |
| new Circle and setPosition | Creates the ball and puts it in the centre | No ball appears, or it starts in the wrong place |
| setColor(Color.yellow) | Makes the ball easy to see | The ball appears in a default colour that is hard to spot |
| mouseMoveMethod(moveLeash) | Tells the system to call moveLeash on every mouse move | Nothing happens when the mouse moves |
| e.getX() and e.getY() | Read the current mouse position | The program has no idea where the mouse is |
| setEndpoint on the line | Moves the end of the leash to the ball | The line stays still while the ball moves |
Try changing the program yourself to see this in action. Change the radius to 15. Change the colour to red. Move add(ball) above add(leashLine) and watch the drawing order change. Each small change teaches you which line controls what, and that knowledge lasts far longer than a memorised answer.
How the Ball, Line and Mouse Work Together
Step back and watch the whole system as one. The mouse is the input. The ball and the line are the output. Start sets the stage, and moveLeash keeps it updated. At the start, the ball is in the centre, the line is a point in the centre, and the program waits. Move the mouse one pixel, and the system creates an event object with the new position and calls moveLeash. MoveLeash moves the ball one pixel and moves the end of the line one pixel. Keep moving, and the same thing happens dozens of times a second. The ball tracks the mouse, and the line stretches and swings to stay connected.
When you stop moving the mouse, the calls stop too. The ball stays where it was last put, and the line stays stretched to that point. Nothing runs in the background. There is no animation loop and no timer. The program only does work when the mouse has actually moved, which is why it feels responsive. Notice what never changes: the centre, the start of the line, the radius, and the colour. Only two things move, the ball and the end of the line. The leash works because one end is anchored and the other end is free, and that contrast is what your eye follows.

Common Errors and Fixes
Most students who struggle with this exercise are not struggling with a hard idea. They are struggling with one small mistake that is easy to miss when reading their own code. Work through the list below from top to bottom, and check the simplest causes first. In programming, the simplest cause is usually the right one.
The most common problem is that the ball does not move at all. The usual cause is that mouseMoveMethod was never called, or it was called with the wrong function name. Check that mouseMoveMethod(moveLeash); is inside start, and that the function is spelled moveLeash, exactly, including capital letters. JavaScript is case sensitive, so moveLeash and moveleash are two different names. A second common problem is that the ball moves but the line stays still. The usual cause is a missing setEndpoint line inside moveLeash. Check that your mouse function updates both objects, not just the ball.
A third problem is that the line is drawn over the ball. This means the objects were added in the wrong order: add the line before the ball. A fourth problem is that nothing appears at all. The usual cause is that an object was created but never added, or that the program failed before it reached the add lines. Check both add lines, and read the error message in CodeHS, which usually points to the exact line that failed. A fifth problem is that the ball starts in the wrong place, which usually means the centre calculation is wrong. Check that centreX uses getWidth divided by two and centreY uses getHeight divided by two. A sixth problem is a spelling or capitalisation mistake: getX is not getx, setPosition is not setposition, and Color is not color. If an error says something is not defined, read the name character by character.
| What you see | Likely cause | Fix |
|---|---|---|
| Ball does not move at all | mouseMoveMethod missing or wrong function name | Add mouseMoveMethod(moveLeash) inside start and check the spelling matches the function |
| Ball moves but the line stays still | setEndpoint missing in moveLeash | Add leashLine.setEndpoint(e.getX(), e.getY()) to moveLeash |
| Line is drawn over the ball | Objects added in the wrong order | Add the line before the ball so the ball is drawn on top |
| Nothing appears on screen | Object created but never added, or an earlier error stopped the program | Check both add lines are present and read the error message for the failing line |
| Ball starts in the wrong place | Centre calculation wrong or a fixed number used | Use getWidth() / 2 for centreX and getHeight() / 2 for centreY |
| Ball follows the mouse but lags or jumps | Slow browser or very fast mouse movement | Move the mouse slowly, close other tabs and refresh the page |
| Error says something is not defined | Spelling or capital letter mistake | Compare each name letter by letter with the correct spelling |
| Line points away from the ball | Ball and line given different positions | Use e.getX() and e.getY() for both the ball and the line end point |
When you are fixing a program, change one thing at a time and run it after each change. If you change five things at once and the program starts working, you will not know which change fixed it. If you change one thing at a time, you will know exactly what was wrong, and you will remember it next time.
Testing Checklist: How to Check Your Program Works
Once your program runs, take a few minutes to test it properly. Start by running it fresh and looking at the starting position before you touch the mouse. The ball should be in the exact centre, and the line should be invisible or nearly invisible. Next, move the mouse slowly to each of the four corners, one at a time. The ball should follow you to each corner, and the line should stretch from the centre to the ball. Then move the mouse in a slow circle around the centre. The ball should trace a circle, and the line should sweep around like the hand of a clock, with the ball staying on the end of the line the whole time. Then flick the mouse quickly from one side to the other. The ball should jump to the new position without a long delay. Finally, refresh the page and run it again. The ball should return to the centre, and every test should pass again.
| Test | What to do | Pass means |
|---|---|---|
| Starting position | Run the program and do not touch the mouse | Ball sits exactly in the centre and the line is a point |
| Top left corner | Move the mouse slowly to the top left | Ball follows and the line points to the top left |
| Top right corner | Move the mouse slowly to the top right | Ball follows and the line points to the top right |
| Bottom left corner | Move the mouse slowly to the bottom left | Ball follows and the line points to the bottom left |
| Bottom right corner | Move the mouse slowly to the bottom right | Ball follows and the line points to the bottom right |
| Circle around the centre | Move the mouse in a slow circle | Ball stays on the end of the line the whole way round |
| Fast move across the screen | Flick the mouse from one side to the other | Ball jumps to the new position without a long delay |
| Fresh run after refresh | Refresh the page and run again | Ball returns to the centre and all tests pass again |
If every test passes, your program is in good shape. If one test fails, you now know exactly where to look, and the errors table above will point you to the fix. Testing is not a chore to rush through at the end. It is part of writing the program, and it is how you build confidence that your code does what you think it does.
What This Exercise Teaches You
On the surface, this exercise is about a ball and a line. Underneath, it is about ideas that will keep coming back, so it is worth naming them. The first is mouse events. Real programs react to people through events, and a function that runs when an event happens is called an event handler. Here the event is a mouse movement and the handler is moveLeash. Later exercises use the same pattern for clicks, key presses and timers. The second idea is coordinates. Every position on the canvas is an x and a y. The centre is half the width and half the height. The mouse position is getX and getY. Moving something means changing those numbers.
The third idea is graphics objects. A Circle has properties like radius and colour, and methods like setPosition and setColor. A Line is a different kind of object, with different methods like setEndpoint. Learning to create objects, store them in variables, and call their methods is one of the main skills of this part of the course. The fourth idea is global variables and scope. The ball and the line must be visible to more than one function, so they are declared where every function can reach them. The fifth idea is order of operations: the line is added before the ball, and the centre is worked out before it is used. The sixth idea is separation of setup and updating. Start sets things up once. MoveLeash updates things many times. If the starting position is wrong, you look in start. If the movement is wrong, you look in moveLeash.
Variations and Other Numberings
If you search online for this exercise, you may find it under a different number or with slightly different details. That does not mean you have the wrong exercise. CodeHS updates its courses over time, and different schools use different versions. The same exercise can appear as 9.7.4 in one version and as 4.7.4 in another, and the task stays the same. The number is a position in a particular version of the course, not a fixed identity for the exercise. You may also find versions with a different ball colour, a different radius, or different variable names. None of those differences change the structure: the centre is worked out the same way, the line is added before the ball, the mouse method is registered in start, and the ball and the line are updated with the same mouse position.
Some students meet a similar exercise later in the course, where the ball is tied to a different point, or there are two balls, or the line changes colour as it stretches. Those are natural extensions, and they all build on the same pattern. To see how the exercise fits into the wider course, look at the official CodeHS course outline, which lists Exercise 9.7.4 Leash in Lesson 9.7 on drawing lines. If your assignment instructions differ from this guide in a small detail, follow your assignment. Your teacher is marking your work against those instructions, not against this article. Use this guide to understand the ideas, and use your assignment to decide the exact colour, size and variable names.
A Short Note on Copying Without Understanding
It is tempting, when you are stuck and the deadline is close, to copy a solution, paste it in, and move on. The exercise will be marked as done, and you will feel relieved for a few minutes. Then the next exercise will arrive, and it will use the same ideas, and you will be stuck again, because you never learned them in the first place. There is a better way to use a solution. Read the code, run it, and then change one thing. Change the colour. Change the radius. Remove the setEndpoint line and watch the line stop moving, then put it back. Each small experiment teaches you something copying alone never will. By the end, the code is no longer something you copied. It is something you understand, and you could write it again from scratch. That understanding is also what helps you in tests and exams, where there is no internet to search and no solution to copy.
Frequently Asked Questions
What is 9.7.4 Leash in CodeHS?
9.7.4 Leash is an exercise in Introduction to Computer Science in JavaScript, in Lesson 9.7 on drawing lines. You build a scene where a yellow ball starts in the centre of the canvas and follows your mouse, while a line stays tied between the centre and the ball, like a leash. It teaches you to create graphics objects, place them in the right order, store them in global variables, and respond to mouse movement.
What is the full code for 9.7.4 Leash?
The 9.7.4 leash codehs answers are in the section called The Full Solution Code, explained line by line in the section after it. In short, declare a ball radius of 30 and two global variables, then in start work out the centre, create a Line from the centre to the centre, add it, create a yellow Circle, place it in the centre, add it, and register mouseMoveMethod with moveLeash. That function reads the mouse position and moves both the ball and the end of the line to that position. Check your own assignment first, because your course may ask for a different colour, size or variable name.
Why does my ball not move when I move the mouse?
The most common reason is that the mouse method was never registered, or it was registered with the wrong function name. Check that mouseMoveMethod(moveLeash) is inside start, and that your function is spelled moveLeash, exactly, with the same capital letters. JavaScript is case sensitive, so moveLeash and moveleash are different names. Also check that the function exists and contains a line that moves the ball.
Why does the line stay still while the ball moves?
This happens when moveLeash updates the ball but never updates the line. The fix is to add leashLine.setEndpoint(e.getX(), e.getY()) inside moveLeash, using the same mouse position you gave to the ball. A Line is updated with setEndpoint, not setPosition, because you are changing where its far end sits while the near end stays fixed in the centre.
Why is the line drawn over the ball instead of under it?
Objects are drawn in the order they are added to the canvas, and objects added later are drawn on top. If you add the ball first and then the line, the line is drawn on top of the ball. Swap the two add lines so add(leashLine) comes first and add(ball) comes second, then run the program again. The ball will sit neatly on top of the end of the line.
What do e.getX() and e.getY() mean?
The letter e stands for the event object, a small bundle of information about the mouse movement that just happened. The system creates it every time the mouse moves and passes it to your function. The method e.getX() gives the current horizontal position of the mouse, and e.getY() gives the current vertical position. Your function uses those two numbers to move the ball and the end of the line to the same spot.
What is the difference between setPosition and setEndpoint?
SetPosition moves a whole object, such as a Circle, to a new x and y position. It is what you use to move the ball. SetEndpoint changes where a Line ends, while leaving where it starts untouched. It is what you use to stretch the leash. If you call the wrong method on the wrong object, the program will fail, so it is worth learning which method belongs to which object.
Is 9.7.4 the same as 4.7.4 Leash?
In many cases, yes. Different versions of the CodeHS course number the same exercise differently, so it can appear as 9.7.4 in one version and as 4.7.4 in another. The task is the same: a ball follows the mouse, and a line ties it to the centre. If you are unsure, check the lesson title in your course. If it is about drawing lines and the task describes a ball on a leash, you are in the right place. If you enjoy this kind of plain language walkthrough, the same step by step style is used in our guide to TechTrendery.com USA, in our walkthrough of BrumeBlog.com, and in our article on Megazee.com.
Verdict: A Small Exercise That Teaches Big Ideas
9.7.4 Leash looks like a small task, and in lines of code, it is: twenty lines, one ball, one line, one mouse. Yet it teaches ideas that run through the whole graphics section of the course, and through interactive programming in general. It teaches you to measure a canvas instead of guessing at its size, to create objects and store them where other functions can reach them, to add them in the right order, and to listen for mouse movement and react to it. If you can explain why the line is added before the ball, why the ball and the line live in global variables, why the centre is worked out from getWidth and getHeight, and why moveLeash updates both objects with the same mouse position, then you understand this exercise properly, and you are ready for whatever comes next.
So run the code, test it with the checklist in this guide, and then break it on purpose, just a little, so you can see what each line does. Change the radius. Change the colour. Swap the order of the add lines. Remove the setEndpoint line and watch the line stop moving, then put it back. Those few minutes of playing with the program will teach you more than reading about it ever could, and they will leave you with a program you genuinely understand, not just a program that happens to work. That is the real goal of 9.7.4 Leash, and it is well worth the time it takes to get there.